How to Set up Cloud Recording in an Amazon S3 bucket
Learn how to set up cloud recording for your Whereby Embedded video calls.

If you use Whereby to host virtual classroom lectures or remote conferences, you may want to record your sessions and make them available for download later. Whereby Embedded allows you to do just that. After reading this post, you'll know how to enable cloud recording for your video calls using Whereby, and save them to an Amazon S3 account that you or your organization manage.
What you'll need
In order to enable cloud recording, you'll need two things:
A paid Whereby Embedded account. Get started here.
An Amazon Web Services account with the ability to add users, create access policies, and manage S3 buckets.
You can also use Whereby-provided storage if you prefer, charged per GB day.
Set up your S3 bucket
Whereby Embedded gives you control over your recordings. You do, however, need to set up a bucket and user first. Log in to your AWS Management Console, and go to the S3 management screen. Click the Create bucket button, then set your bucket's name and region. You can change the other settings if you'd like, but it isn't necessary. Amazon S3 uses sensible defaults.

After creating a bucket, you'll need to create an Identity and Access Management or IAM policy. Go to the IAM → Policies section of the AWS console, then click Create policy. Use the Visual editor to do the following:
Set S3 as the service.
Specify Write and PutObject as the actions allowed under this policy.
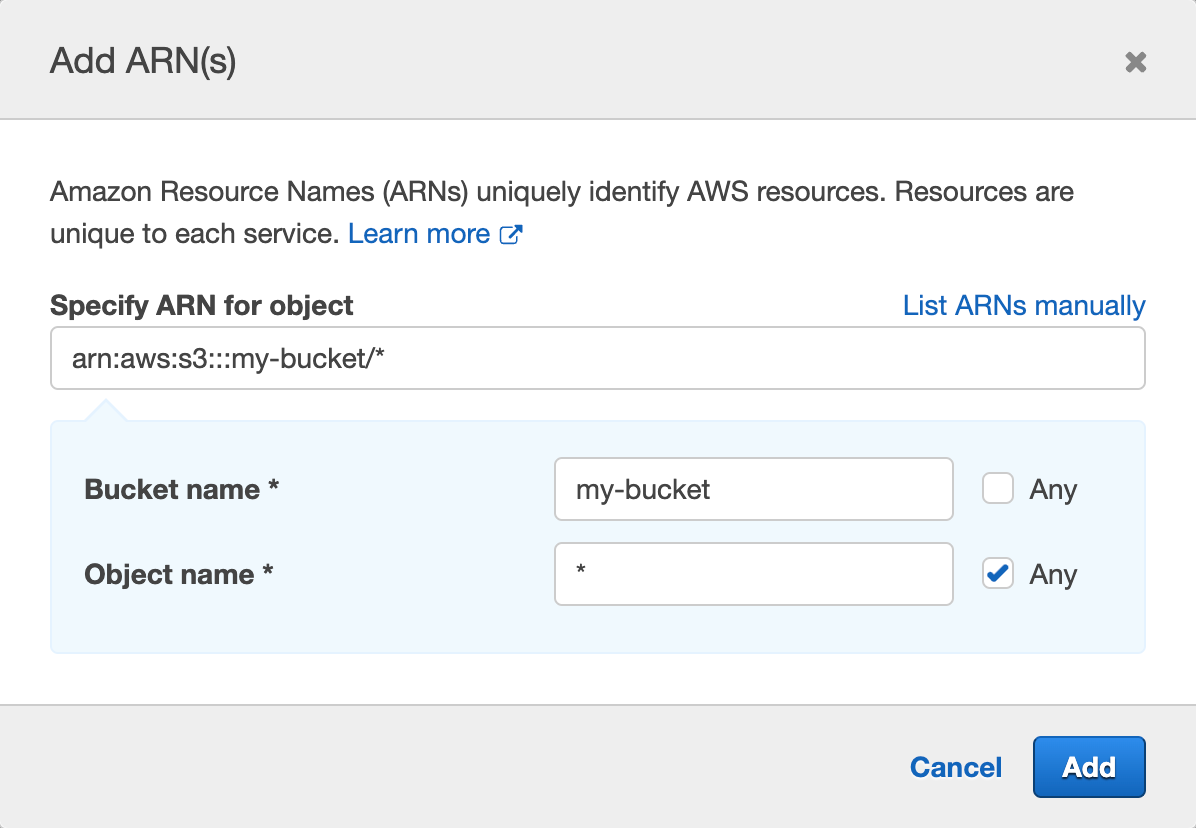
Specify your bucket's name, in the Resources panel, and select the Any for the Object name field.
Setting the Bucket name and Object name, automatically sets the Amazon Resource Name or ARN for this policy. Your Resources pane should resemble the image below.

Add tags on the next screen if you want. On the last screen, give your policy a name and save it. Now you can create a new user.
Create an IAM user with access to your bucket.
Go to the IAM → Users console, and click Add users. Name your user, and select Access key - Programmatic access as the access type. On the next screen, choose Attach existing policies directly. Use the search box to find and select the policy you created in the previous step. You'll receive an Access key ID and Secret access key after your user is created. Download your credentials and save them somewhere safe. You'll need them to configure recording for your room.
Enable Recording in the Dashboard
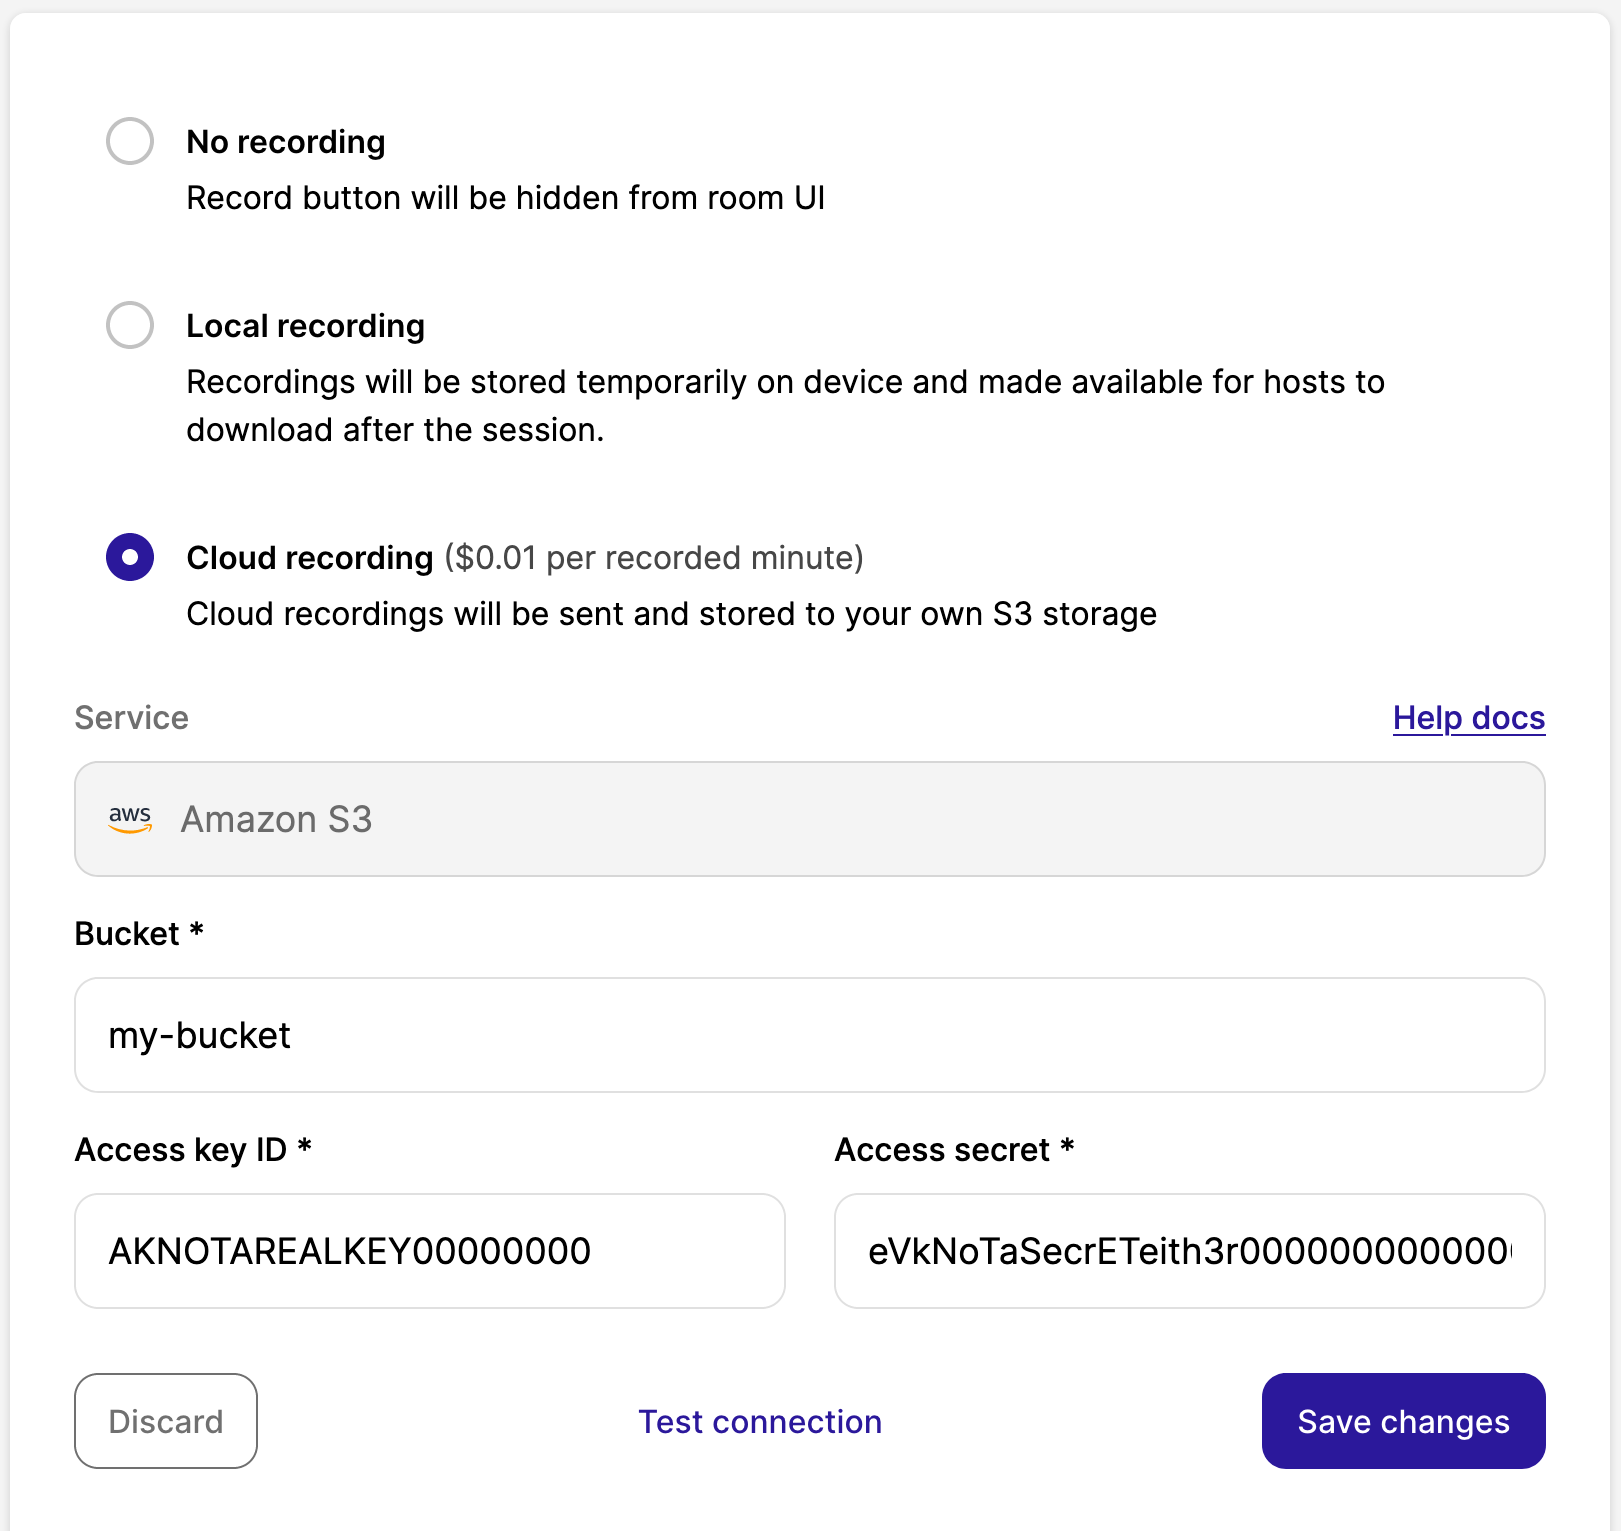
Now you're ready to enable recording. Log in to your Whereby Embedded dashboard. Go to the *Recording* panel of the Configure page, and select Cloud recording.
Next, add your Amazon S3 bucket name, access key ID, and access secret. You can use the Test connection button to verify your settings. Then save your changes. Cloud recording will now be the default setting for every meeting room created by your organization's account.

Whereby does charge a fee of $0.01 for each minute of recording. You'll also incur charges from Amazon Web Services when you write files to S3, when you download files, and to store them.
Set a Recording trigger
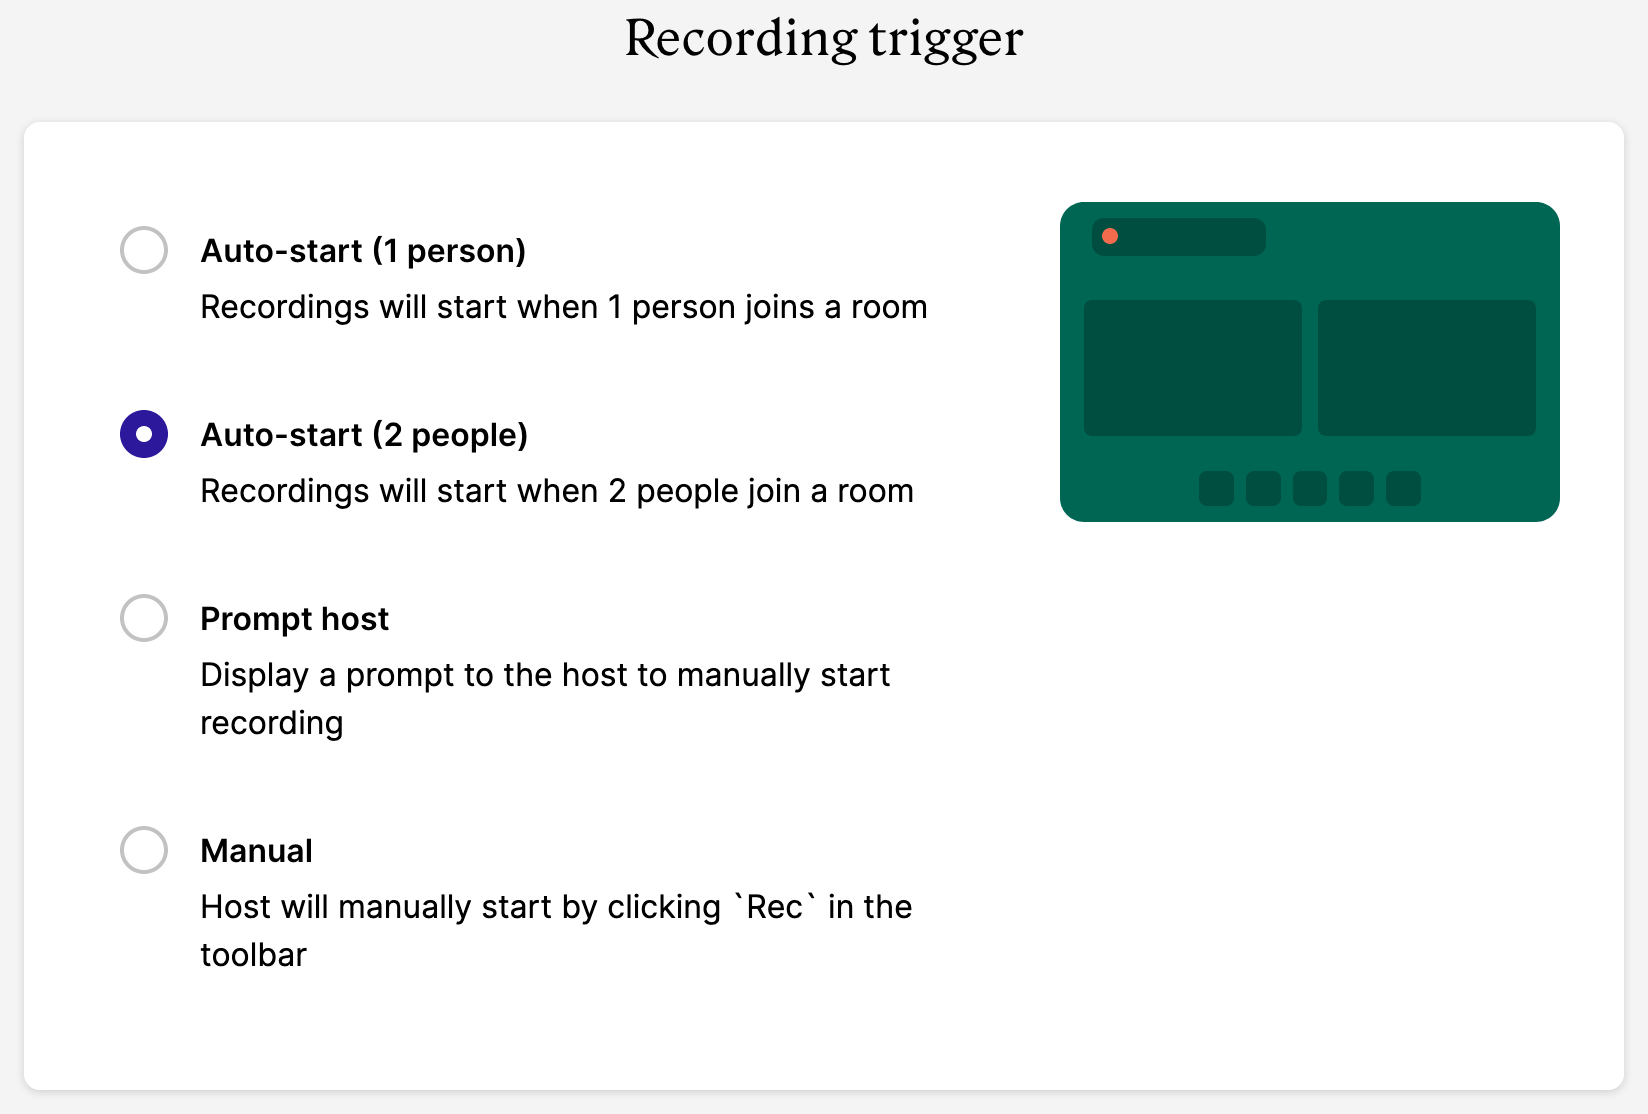
You may also want to set a Recording trigger. Hosts can start recording manually by clicking the Record button in the toolbar at the bottom of the screen. You can also set your rooms to record automatically, either when one person joins a room, or after a second person does.

Your recording trigger can also be a prompt for the host. If the Prompt host option is selected, the host will see a small notification that the meeting can be recorded.

Whereby Embedded lets you record your video calls and save them to a storage service that you control. You can choose whether to record every meeting, or manage recording for individual rooms using the dashboard or API.


