Browser SDK Tutorial: How to Customize Video Tiles
Discover how to customize the video tiles in a Whereby call using the Browser SDK with React hooks.

One advantage of the Whereby Browser SDK is ease of customization. You can customise your video calling UI right down to the video tiles using what you already know: CSS, JavaScript, and React.
In this tutorial, you'll create a pair of video tiles. Before starting, you'll need a Whereby Embedded account. You can get started for free with 2,000 participant minutes each month — perfect for trying our features.
Once you have your account, create a meeting room using your account dashboard or Whereby's REST API. You can leave the room unlocked for development purposes.
This tutorial assumes:
You're familiar with React, Node, and either npm or Yarn.
You've already set up a React project. If not, Vite or Parcel can get you up-and-running quickly.
You've read our earlier post, How To Add Video Conferencing to Your Web App Using the Whereby Browser SDK.
You'll need this background to understand some of the code examples here.
What we're creating
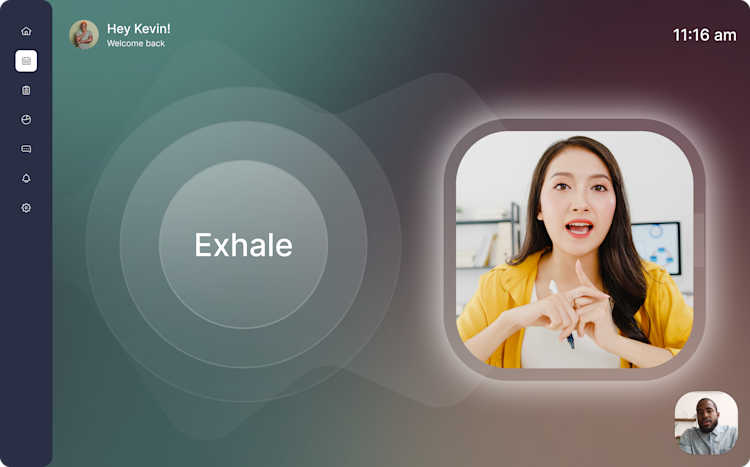
Whereby is well-suited to coaching, telehealth, remote classrooms, and virtual meetings. We'll use the Whereby Browser SDK and CSS to create video tiles for a remote 1-to-1 coaching business, BreatheCoaching. The image below illustrates what we're going to build.
Create a Participant component
Start by adding a Participant component to your project. This is the component we'll use to display each participant's video.
import React from "react";

const Participant = (props) => {

  /*
   * In the parent component:
   * <Participant {...localParticipant} {...components} />
   */
  const {
    VideoView,
    stream
  } = props;

  return (
    <div>
      {stream &&
        <VideoView mirror stream={stream} />
      }
    </div>
  )
}

export default Participant;
Participant expects a VideoView component prop from its parent. VideoView requires also a stream prop value — the stream property of either a LocalParticipant or RemoteParticipant object. Pass the stream prop of Participant along to VideoView, as shown above.
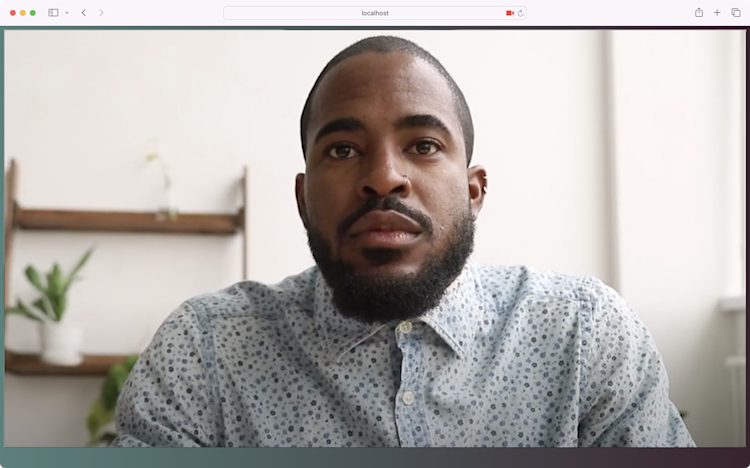
At this point, the video tile should fill your entire browser, as in Figure 2. By default, the VideoView component expands to fit the width of its container. Let's constrain its width with some CSS.
Managing the video tile's dimensions
Add a Participant.css file to your project. Import it into the Participant component file as shown below.
import React from "react";
import 'Participant.css';
Add a className attribute with a value of participant to the containing div element. You'll use this attribute value as the selector in your CSS.
//…

return (
  <div className="participant">
    {stream &&
      <VideoView stream={stream} />
     }
  </div>
)
Since the design specs for BreatheCoaching require square video tiles with rounded corners, set the width property for the .participant class. Use the aspect-ratio CSS property to enforce square dimensions.
:root {
  --localParticipantWidth: 200px;
}

.participant {
  aspect-ratio: 1;
  width: var(--localParticipantWidth);
}
Now our video tile is 200 pixels wide by 200 pixels tall. Our video source however, is only 112.5 pixels tall (Figure 3).
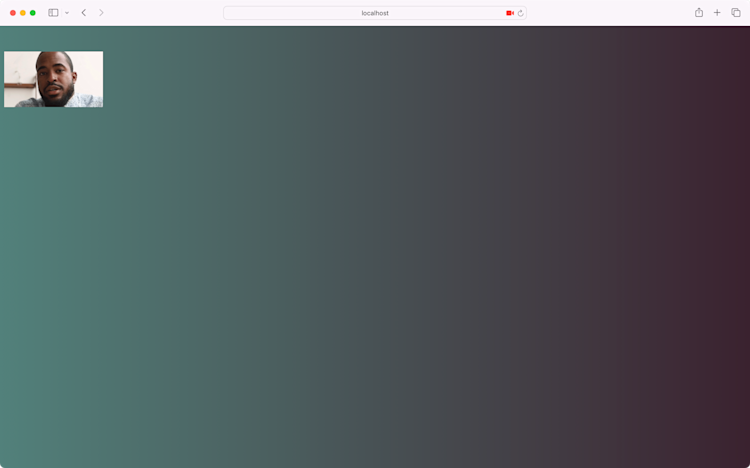
Videos maintain their aspect ratio regardless of the dimensions of the video element or its containing ancestors. To resolve this, use the object-fit CSS property and the cover value.
.participant > video {
  object-fit: cover;
}
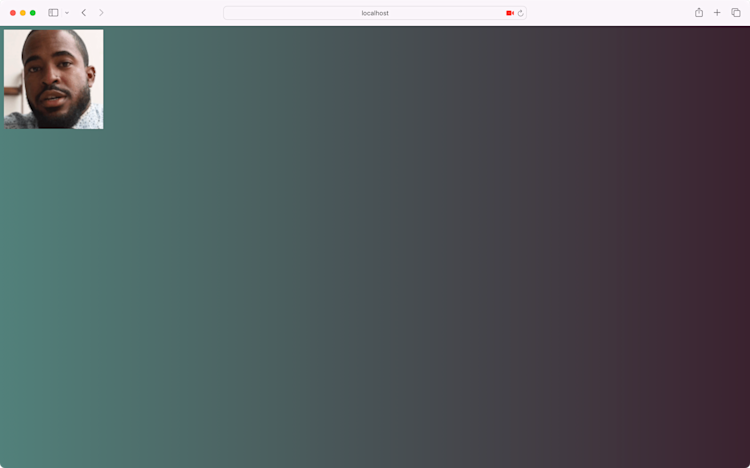
Using object-fit: cover causes the browser to scale the video source so that it fills the container, but maintains its aspect ratio. Your video tile should now resemble Figure 4.
Rounding the corner
Our design also calls for rounded video tile corners. Add a border-radius declaration to the .participant rule set, along with overflow: hidden. The latter rule ensures that the corners of the video don't extend past its container.
.participant {
  aspect-ratio: 1;
  width: var(--localParticipantWidth);
  border-radius: 25%;
  overflow: hidden;
}
Your video tile should now resemble Figure 5.
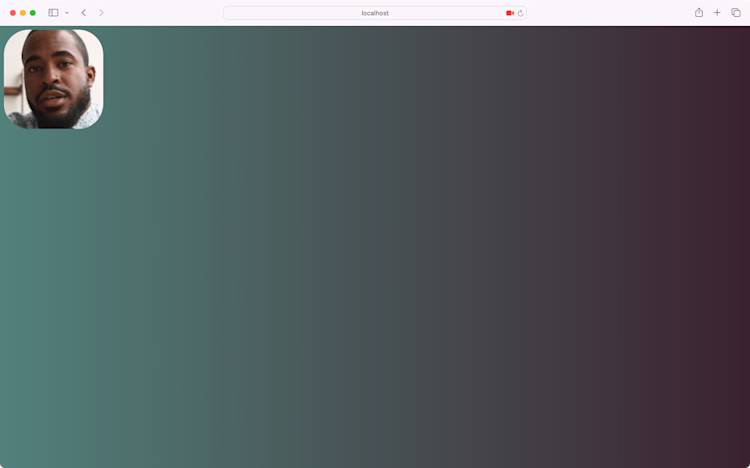
Although the local and remote participant tiles are different sizes, there's a lot of overlap in their appearance. Instead of creating a separate component, let's add some code to support a remote participant variation.
Same component, different look
Each participant object contains a property named isLocalParticipant. For remote participants, the value of this property is always false. Use this property to conditionally add a remote class to the remote participant tile. First, update the destructuring assignment to extract isLocalParticipant from props.
 const {
  VideoView,
  stream,
  isLocalParticipant
} = props;
Then conditionally add a remote class to the containing div.
return (
  <div className={`participant ${ !isLocalParticipant ? '' : 'remote'}`>
    {stream &&
      <VideoView stream={stream} />
     }
  </div>
)
NOTE: Using the ternary operator is fine for tutorials. For production-ready projects, consider the classnames package instead.
Finally, add a .remote rule set to Participants.css. Override the width property value from .participant and add a transparent border. Use the box-shadow property to add the halo.
:root {
  --localParticipantWidth: 200px;
  --remoteParticipantWidth: 400px; /* Add a --remoteParticipantWidth custom property */
}

//…

.remote {
  width: var(--remoteParticipantWidth);
  border: 1.2rem solid transparent;
  box-shadow: 0 0 2rem 0.5rem #fff;
}
NOTE: You can also use the filter property and the drop-shadow() filter to create the halo effect.
Your remote participant tile should look a bit like Figure 6.
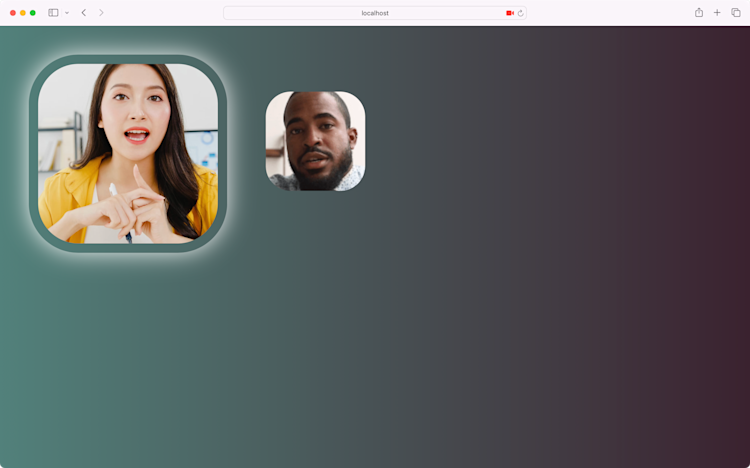
Put it together with the rest of our UI design, and you can launch BreatheCoaching in no time.
Learn more
We've just scratched the surface of how you can customize video tiles with the Whereby Browser SDK.
To learn more about how the Whereby Browser SDK makes it easy to add video calls to your web application, check out our other tutorials and reference documents.
How To Add Video Conferencing to Your Web App Using the Whereby Browser SDK
Watch: How to Build a Custom Video Call App With the Whereby Browser SDK (duration: 1 hour)
Add a pre-call page or integrate Whereby with Next.js with help from Whereby's GitHub repository.
React Hooks Reference from the Whereby docs.


